Equipment
|
Part Number 109996 - Calibration Check Kit includes the following (Shelf life 4 months) |
|
|
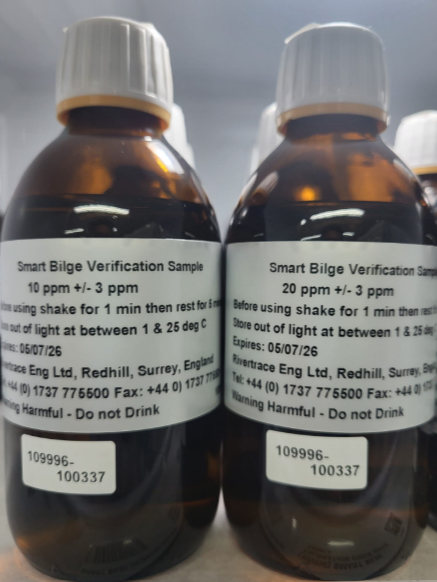
225mL of 10ppm Calibration Check Fluid |
Pt No. 109994 supplied |
|
225mL of 20ppm Calibration Check Fluid |
Pt No. 109995 supplied |
|
Bottle Brush |
Pt No. 100244 supplied |
|
Syringe |
Pt No. 109992 supplied |
|
Nylon tube 6mm OD x 150mm long |
Pt No. 109079 supplied |
Procedure
- Ensure that the separator is stopped and that no water is flowing through the monitor.
- Use the down key on the front panel to access the user menu.
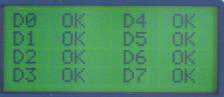
- Select diagnostics – view detectors. This will force monitor into clean water flushing
Mode and clean the cell. Operate the manual clean to ensure the cell tube is clean.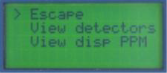
- Press the left hand key (Enter). This will stop clean water flowing through the cell. - Note: If you have a flowmeter fitted on your OCM this will go into alarm stating no flow. You can ignore this error message and continue.
- Remove the manual clean attachment from the outlet block.
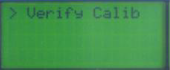
- Use the down key to access the calib menu.
- Use the syringe to remove all fluid from the cell and dispose of.
- Take the bottle of 10ppm Calibration Check Fluid, shake for one minute to obtain uniformity, and then leave to stand for a further five minutes, to release any entrained air bubbles.
- Pour in a quantity of the 10ppm Calibration Check Fluid into the outlet block, to the level of the pipe connection. Drain by using the syringe and dispose of.
Pour in a further quantity of the Calibration Check Fluid, cover the outlet block to exclude light and wait for one minute. Check that the display reads 10 ppm ± 3.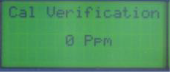
- Pour clean potable water into the cell and then use the syringe to remove it.
- Take the bottle of 20ppm Calibration Check Fluid, shake for one minute to obtain uniformity, and then leave to stand for a further five minutes, to release any entrained air bubbles.
- Pour in a quantity of 20ppm Calibration Check Fluid into the outlet block, to the level of the pipe connection. Drain by using the syringe and dispose of.
Pour in a further quantity of the 20-ppm Calibration Check Fluid, cover the outlet block to exclude the light and wait for one minute. Check that the display reads 20ppm ±3. - Drain the fluid by using the syringe and dispose of. Replace the manual clean attachment.
- Turn off power.
Provided that tests according to 3.9 and 3.12 produce 10ppm ±3 and 20ppm ±3 respectively, the monitors factory calibration is verified, and a Calibration Check Certificate can be issued by an authorised service centre against the device provided the factory calibration certificate is valid.
*Note:
Sufficient materials have been supplied to give a minimum of two operations, however it should be noted that the Calibration Check fluids have a limited shelf - life.
Calibration Check Fluids must be stored in a cool dark place for the duration of their shelf life.
Calibration Check Fluids must be disposed of in accordance with local disposal instructions for chemical waste.
Please observe bottle label- as below example: